Category: Git
Git Branching
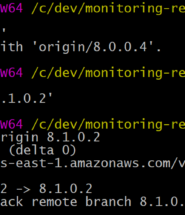
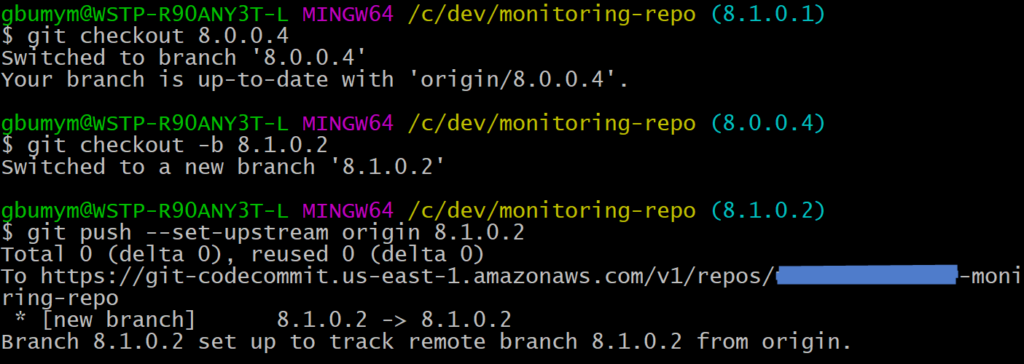
Here’s a basic example of branching from the command line, for reference. This sequence of commands:
- switches the user to the intended “source branch”,
- creates a new local branch (and checks it out at the same time), and
- pushes the new branch to the origin.
In this project, we’re using version numbers as the branch names.
Connect to an AWS CodeCommit git repository
Let’s review how to connect to an AWS CodeCommit git repository. As new git users quickly find out, each implementation of git (github, bitbucket, CodeCommit etc) has a slightly different way of authenticating the user. These steps only apply to the AWS implementation, and will apply to either Linux or Windows.
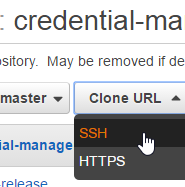
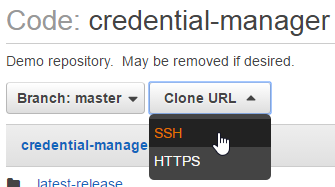
There are two ways developers can connect with git: ssh and https. With CodeCommit I have always used ssh, because it is simpler and works more easily.
There are AWS cli commands for high-level tasks (such as create repository, or list all repositories), but developers normally interact with CodeCommit through a standard git client.
Prerequisites
You’ll need:
- Your own AWS account. This is because AWS bills according to the number of users who access repositories. Currently the first 5 users are free, and after that the charge is $1/user/month (pricing).
- A git client. For Windows users, I recommend Git for Windows. This gives you a command line with everything that git offers, so there’s no additional layer to obscure its functionality. Best of all, you get a free Bash shell. So goodbye putty, hello ssh (for starters). If you are on Windows and do NOT use this client, sorry but these instructions probably do not apply to you.
Create SSH Key
The first step is to create an ssh key which will be used ONLY to authenticate us to CodeCommit. Open a bash shell and use the ssh-keygen command. Name the key as appropriate:
Michael@Mendelson MINGW64 /c/dev/aws/credential-manager (master)
$ ssh-keygen
Generating public/private rsa key pair.
Enter file in which to save the key (/c/Users/Michael/.ssh/id_rsa): codecommit
Enter passphrase (empty for no passphrase):
Enter same passphrase again:
Your identification has been saved in codecommit.
Your public key has been saved in codecommit.pub.
The key fingerprint is:
SHA256:OWyerhZPzJp5ozI/mF7PsHjU09Dq1hcYrBlcdgE+XEA Michael@Mendelson
The key's randomart image is:
+---[RSA 2048]----+
|         .Eoo.   |
|         oo..    |
|       . =+.     |
|       .+.+.     |
|       +SB o     |
|      ooXoo .    |
|     +oOoo   .   |
|    =oB** . .    |
|   .o*=*+. .     |
+----[SHA256]-----+
The command above creates two files: codecommit.pub (public key) and codecommit (private key). I recommend moving them both to your ~/.ssh/ directory.
Add Public Key to AWS
Log into AWS and go to the IAM (Identity & Access Management) service. Go to the list of users, and select your user. Find the Security Credentials tab. At the bottom you’ll see SSH keys for AWS CodeCommit. Click the upload button and paste in the SSH public key. When you click OK, take note of the SSH Key ID.
Get the Repository Url
While you’re in the AWS console, get your connection URL. In CodeDeploy, navigate to your repository and find it:
Set up Git
There are a couple of ways to make this work. I’ll star with the way I prefer.
SSH config file
Find your .ssh directory (linux: ~/.ssh, windows: C:\Users\Username\.ssh) and find a file called config. If it doesn’t exist, create it.
Add the following lines, substituting your SSH Key ID in the User field, and your private key file name in the IdentityFile field. Also note that the Host name specifies the AWS region where the repo was created:
Host git-codecommit.us-east-1.amazonaws.com
  User APKAJTDPQ6HZKPCBOCXQ
  IdentityFile ~/.ssh/codecommit
You should now be able to access your repository as follows (substitute your ssh string):
git clone ssh://git-codecommit.us-east-1.amazonaws.com/v1/repos/repo-name
Now let’s say you have repos in multiple AWS accounts. You can use the config file to set up an alias for each:
Host codecommit-myrepo
    Hostname git-codecommit.us-east-1.amazonaws.com
    User APKAJTDPQ6HZKPCBOCXQ
    IdentityFile ~/.ssh/codecommit
Host codecommit-client
    Hostname git-codecommit.us-east-1.amazonaws.com
    User APKAI4I45LFFKYK4T4A
    IdentityFile ~/.ssh/codecommit-client
Then access your repositories like this:
git clone ssh://codecommit-myrepo/v1/repos/repo-name
On the URL
With this method, you don’t need to bother with the config file – just add your SSH Key ID to the url string, and your key goes in your .ssh directory. It should be picked up automatically.
git clone ssh://APKAJTDPQ6HZKPCBOCXQ@git-codecommit.us-east-1.amazonaws.com/v1/repos/repo-name
Troubleshooting
Here’s a list of things to check, if you have everything set up, but you’re getting permission denied.
- Make sure your AWS account has the correct privileges to use CodeCommit. Here’s more information on that.
- Test your connection as follows:
Michael@Mendelson MINGW64 /c/dev/aws
$ ssh git-codecommit.us-east-1.amazonaws.com
You have successfully authenticated over SSH. You can use Git to interact with AWS CodeCommit. Interactive shells are not supported.Connection to git-codecommit.us-east-1.amazonaws.com closed by remote host.
Connection to git-codecommit.us-east-1.amazonaws.com closed.
If this test does not work, you can see ssh debugging information by modifying your config file to look like this:
Host git-codecommit.us-east-1.amazonaws.com
  User APKAJTDPQ6HZKPCBOCXQ
  IdentityFile ~/.ssh/codecommit
  LogLevel DEBUG3
This gives you a ridiculous amount of information. Use DEBUG2 or DEBUG1 if you prefer.
Git: Merging changes from one upstream branch into another
Let’s say we have two branches, “Development” and “Testing”, in the upstream repository. Our developers push their changes to the Development branch. Periodically during the development cycle, we’ll need to update our Testing branch to bring it in line with the Development branch.
Some of these commands are optional (and are marked as such) – they just make things easier, or demonstrate what’s going on. Note that we never use the “merge” command, but turns out that “pull” uses merge behind the scenes.
The first thing you’ll need to do is to open a git/bash command line. And did I mention we’re on Windows?
#SETUP: clone the branch Testing onto your local machine (in a directory called “pfsda-integration”)
git clone https://mycompany.com/DefaultCollection/_git/my-project -b Testing my-project-testing
cd my-project-testing/

#SETUP: for convenience (so you won't have to enter your user name and password every time):
git config credential.helper wincred

#OPTIONAL: You'll see logs dating back to when you created the branch. type q to exit.
git log

#pull all changes present in the Development branch into your local copy of Integration.
git pull . origin/Development

#OPTIONAL: Now you'll see logs from today. type q to exit.
git log

#push local changes to current upstream branch (i.e. Testing)
git push
Using Git with Visual Studio 2013
In this post I’ll outline how to make code changes when using Git with Visual Studio. This applies regardless of where git is hosted (TFS, GitHub or elsewhere).
Git differs from other source control because of its “branch often” philosophy. Plus the fact that you have a copy of the entire repository on your local machine! But despite the fact that TFS tries to make the process easy, there’s still a process to follow when doing development. Best practice dictates that instead of just checking our changes into origin/master (the “upstream repository”), we’ll want to do the following:
- Create a local branch
- Do your work and commit changes
- Merge changes with local master
- Push changes to upstream master
Note that in some cases, origin/master will NOT be our upstream repository. For example, we might be working off a Development branch. So make adjustments as appropriate when following this guide.
I’m going to assume that you’re already set up with your repository, either through TFS or by using the method outlined in my blog. Let’s say you’re ready to develop.
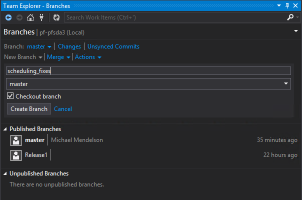
Create a branch
- At the TFS main menu, click on Branches
- Click on New Branch and set the name.
- Click on Create Branch.
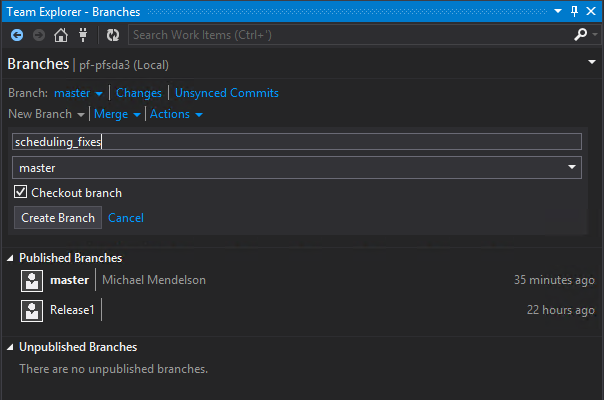
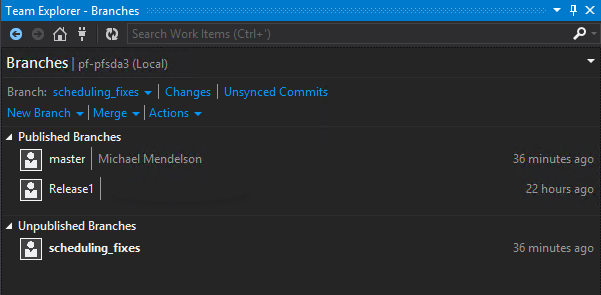
You’ll see your new branch under “Unpublished Branches”. In TFS, “unpublished” means that the branch exists only locally. Note that the value of the branch dropdown has been changed. You are now working on the new branch that you’ve created.
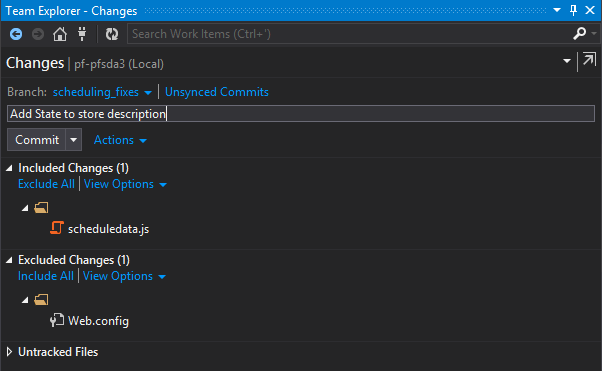
Do your work and commit changes
- Go to the Changes view. Your changed items will be listed.
- Add a comment for your commit (required).
- Click Commit. Changes are committed locally.
Merge your changes
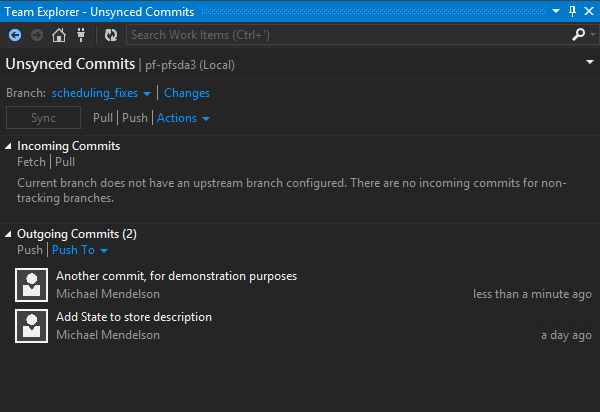
Once you’re done and are ready to contribute your changes to the upstream server, your Unsynced Commits tab might look something like this:
- In the Merge tab, click on the Merge dropdown.
- Set it up to merge the changes to your local master.
- Click Merge.

Since this is your LOCAL master, you’re unlikely to have conflicts. Notice that you’ve been automatically switched to the master branch. You’re done with your old branch, and it can be deleted if appropriate.
Push your changes
Time to push your changes upstream! From the Unsynced commits tab, do the following:
- Click Pull to merge all changes locally.
- Address any conflicts between our check-ins and the merged ones.
- Retest the code as necessary.
- Push again.
Note: The Sync button will both pull and push in a single step. The problem with this approach is that you don’t have the opportunity to test any merged changes!
If your local repository is in sync with the upstream server, you can simply push without the pull. But to avoid an error, simply pull first.
If your push was successful, you’ll get the following:
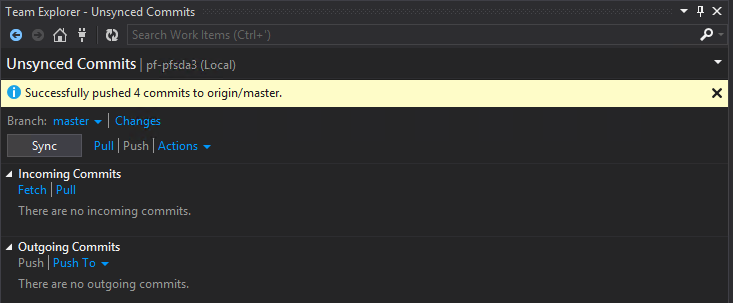
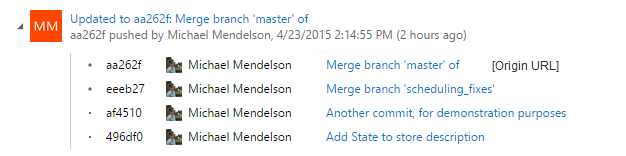
Success! When I view the history in TFS, my merge looks like this:
Related: Getting started with Git/TFS (relates to git hosted on TFS)
Getting started with Git/TFS
I recently moved one of my projects to a TFS Git repository. But Git did not start out as a Microsoft product, and Git is a relatively recent addition to TFS. The TFS Visual Studio tools give us some powerful shortcuts, but some things can only be done on the command line. Here’s how to get the best of both worlds.
Related: Using Git with Team Foundation Server and Visual Studio 2013
Install Git
If you haven’t done so, you’ll need to install Git. This will allow you to run the command line tools, and (as an added bonus) you’ll get a BASH shell as well. So if you ever wanted to have a Linux shell on your Windows box, now’s your chance. IMO it’s good to know Linux, but hey, I’m not here to lecture.
- Go to http://git-scm.com/download/win
- There are three options in the install. They can be a bit involved, but they’re worth reading carefully. If you’re avoiding the BASH shell, you’ll want to choose the option to make git available in the Widows path.
Set up alternate credentials in TFS
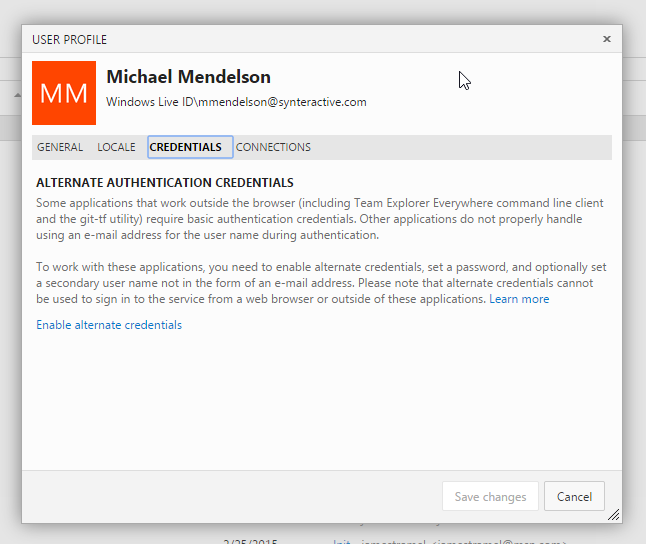
The first thing I found was that my Microsoft Online user name and password don’t work, when attempting to authenticate against git. A bit of research revealed that I had to take an additional step.
- Navigate to the git url for your git repository, and log in. In my case it was something like http://companyname.visualstudio.com/DefaultCollection/_git/rep-name/
- Click on your user name -> My profile -> Credentials. Click on the link at the bottom “Enable alternate credentials”, and create an alternate credential.
Clone your project
With Git, the way to get started with a project is to clone it. Among other things, this copies the entire repository to your working directory.
- Go back to the command line and issue the clone command:
git clone http://companyname.visualstudio.com/DefaultCollection/_git/rep-name/
- When prompted, use the alternate user name and password that you just set up.
The clone command will replicate the project on your local machine, and you’re good to go.
Most commands (including clone) can be performed directly in Dev Studio, but the command line will be there if you need it.