Jenkins with MSBuild
It’s safe to say I’m a huge proponent of Continuous Integration. I got started with CruiseControl, and moved on to TeamCity a few years ago. Now, in need of a new system, I’ve set my sights on Jenkins. It’s open source and is in wide use throughout the developer community. I can recommend it to clients without having to talk about possible licensing issues down the road.
There’s a lot that can be done with Continuous Integration, but I’m going to outline some bare-bones goals for this guide:
- Build the product (a web app), integrating contributions of multiple team members.
- Notify members of broken builds, so team members can get right on a fix.
- Run unit tests – a failure is treated as a broken build.
- Finally, deploy the product to a development site.
We’ll use MSBuild, MSTest, simple email for notification, and deploy to IIS.
Jenkins Initial Setup and Configuration
First, install Jenkins from http://jenkins-ci.org/. Jenkins is a java-based product, so it runs anywhere. As a Windows use, I’m going with that install, which includes a compatible JRE. Jenkins also includes an integrated web server (perhaps based on Tomcat?), and will run on port 8080. At blog-time, the version was 1.602.
The Windows version installs as a service by default, and includes its own JRE, so you don’t have to worry about Java compatibility issues.
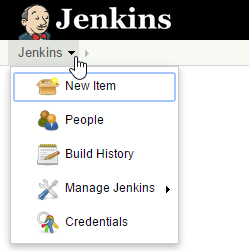
Once it’s installed, go to http://localhost:8080. The Jenkins front end is rather clunky (maybe someday someone will rewrite it in AngularJS). It’s configured through a dropdown menu which appears when you hover and click in the exact spot shown:
Plugins
It’s good to start with plugins before we hit the overall configuration settings, because we know we’re going to need some of them.
Jenkins is customized through a robust system of plugins, which can be installed from within the app. Go to Manage Jenkins->Manage Plugins. The Available tab lists what you can install. Jenkins comes with some plugins pre-installed. I recommend updating any plugins listed on the Updates tab. Once that’s done, you might need the following:
- MSBuild Plugin – This makes it easier to run MSBuild scripts.
- MSTestRunner Plugin – It’s easiest to use MSTest if you have Visual Studio installed on the test server. If not, you can follow these instructions or investigate Visual Studio Agents.
Configuration Settings
Configure Jenkins at Manage Jenkins -> Configure System. Here are the basics:
- Jenkins Location
- Jenkins URL: This URL will be sent out in notifications.
- System email address: Will be used as the “from” address for notifications.
- E-mail Notification
- Set this up to point to an SMTP server of your choice. I had pretty good luck using my Gmail SMTP. You can find instructions for that here. And here’s the link for two step authentication.
- The Email-ext plugin is commonly used, for more flexible control over notifications. Out of the box, Jenkins will send emails if a build fails or is fixed.
- MSBuild
- Click on Add MSBuild, and enter the full path of MSBuild.exe, including the executable name. I received an “invalid directory” warning, but this is the only way I could get it to run. On my machine, MSBuild.exe was at C:\Program Files (x86)\MSBuild\12.0\Bin\msbuild.exe
- MSTest
- Similar to MSBuild. On my dev machine, MSTest was at C:\Program Files (x86)\Microsoft Visual Studio 12.0\Common7\IDE\mstest.exe
Set up Project
Select New Item->Freestyle Project. Here are the sections you’ll need to pay special attention to:
- Source Code Management
- Point to the code repository to monitor. It might be a good idea to create a code repository user specifically for this purpose, especially since at some point you might be tagging your builds through Jenkins.
- Build Triggers
- There is no default value for triggering your build. For continuous integration the best option is probably to check your code repository every few minutes for changes, and only run the build if necessary. Select Poll SCM, and enter H/3 * * * * in the box. The schedule is based on CRON so you can get as complex as you want.
- Build/Build a Visual Studio Project
- The simplest way to do this is to point directly to your Solution or Project file.
- If you like, you can also write your own script to run the build in exactly the way you want. Here’s an example of a way to use an MS Build script for deployment as well.
- Build/Run unit tests with MSTest
- You’ll need to point to the compiled DLL containing your tests, within your workspace.
In any of these sections, you can create multiple configurations. So it’s possible to monitor multiple code repositories, perform multiple builds, etc. Quite flexible.
Challenges
Ideally you’ll want to run your CI system on an independent server. If this is not a full-featured development environment, sometimes rounding up the necessary dependencies can be challenging. Here is a script that attempts to package all dependencies for SharePoint 2013.
Happy coding!