Category: AWS
Upload to S3 with expiring link
Upload a file to S3, and create a temporary link for it.
#!/bin/bash
# Add a file to s3 with temporary url, optionally specified in the command line.
if [ -z "$2" ] ; then
    echo "Need at least two arguments:  local source and s3 destination (e.g. file.txt s3://my-bucket/dir)"
	echo "3rd (optional) argument is expiration sends."
	exit 1
fi

if [ -z "$3" ]
  then
    export exp=3600
  else
    export exp=$3
fi

aws s3 cp $1 $2/$1
aws s3 presign $2/$1 --expires-in $exp

echo "expires in $exp seconds"

WordPress in AWS – the Real World
This article outlines one way to wire up WordPress AT SCALE. In the real world, there can be separate and distinct development, staging and production environments. So how should we move information between them, and how should this system work?
Here we take the AWS CodeDeploy/WordPress example to the next level. Standard disclaimer – there are many approaches to this, so adjust to suit your needs. There is room for improvement, so feel free to comment!
In our scenario we have three environments:
- Development environments – The dev team handles theme development, as well as configuration management. So these environments live on their local machines.
- Staging – Any functional changes are tested here before being “elevated” to Production. The development team manages the push of code to this environment.
- Production – Content authors make changes directly to a Production instance. Once functional changes are tested in Staging, the Production Manager can deploy them here. Content approval may be implemented by means of a plugin if desired.
Our overarching challenge is that WordPress stores its content in two ways: In its database and on disk. We need to handle deployment of the WordPress PHP code, themes and any plugins in use. We also want the ability to see all content in any environment.
Overall Architecture

The site runs on multiple EC2 instances which are situated behind an Application Load Balancer (ALB). CloudFront provides caching services, and a web application firewall (WAF) is attached. As typical in these scenarios, DNS is set up so that mysite.com and www.mysite.com point to CloudFront, and origin.mysite.com is set up to point to the ALB.
Source Control
This is an important place to start. We have the ENTIRE WordPress code base checked into git, using AWS CodeCommit. You might also consider using GitHub due to its unique CodeDeploy integration features.
This means that the dev team is responsible for updating WordPress and plugins. They are updated in a dev environment, checked into the code repository, and deployed to production. In addition, activation of of plugins must be scripted, for when new instances come online (see wordpress command line, below).
AWS CodeDeploy
The code in our source control is deployed using AWS CodeDeploy. This allows us to deploy any changes into a somewhat vanilla AMI. I say “somewhat” because an instance running CodeDeploy requires two things: An agent and a role with specific permissions.
We’ve set up a CodeDeploy Application and a Deployment Group for each environment. In this case we’ll name them my-wordpress, dg-staging and dg-production.
Store configuration files in S3
Our deployment process contains some code that downloads the appropriate config file, depending on the environment. CodeDeploy makes the deployment group name available for our use.
#copy the appropriate config file from s3
if [ "$DEPLOYMENT_GROUP_NAME" == "dg-staging" ]; then
	CONFIG_LOCATION=s3://my-bucket/my-wordpress/staging
elif [ "$DEPLOYMENT_GROUP_NAME" == "dg-production" ]; then
	CONFIG_LOCATION=s3://my-bucket/my-wordpress/production
else
    echo "Unrecognized deployment group name: $DEPLOYMENT_GROUP_NAME.  Bailing out."
    return 1
fi
aws s3 cp $CONFIG_LOCATION/wp-config.php /var/www/html/.
Make sure to add s3 read bucket permission to the role used by your servers.
The WordPress Command Line
Any WordPress plugins or scripts must be added or activated using the wp-cli, because we must consider new instances which are being added (or replacing terminated instances). The wp-cli is installed using CodeDeploy’s BeforeInstall hook, and enables us to make changes to WordPress using the AfterInstall hook.
Offload WordPress media files
In a single-instance install, WordPress stores uploaded files locally, but we want to be able to see all authored content in all environments! In order to avoid having to move content between instances we use a plugin which transparently uses S3 to store media files. Here’s what that install looks like in the deployment script:
#Addtional libraries for WP Offload S3 Lite
wp plugin install amazon-web-services --activate --allow-root
#WP Offload S3 Lite
wp plugin install amazon-s3-and-cloudfront --activate --allow-root
Database backup and movement
AWS simplifies the task of creating a high availability database by making RDS available to us. We use separate databases for each environment. We’d like to implement two additional features:
- Some sort of periodic database backup. As unlikely as RDS is to fail, we can also use this to roll back the database to a point in time if necessary.
- A way to “push” the production database to staging or the development environments. If content managers are working through the Production server, we’ll have to do this to keep them in sync.
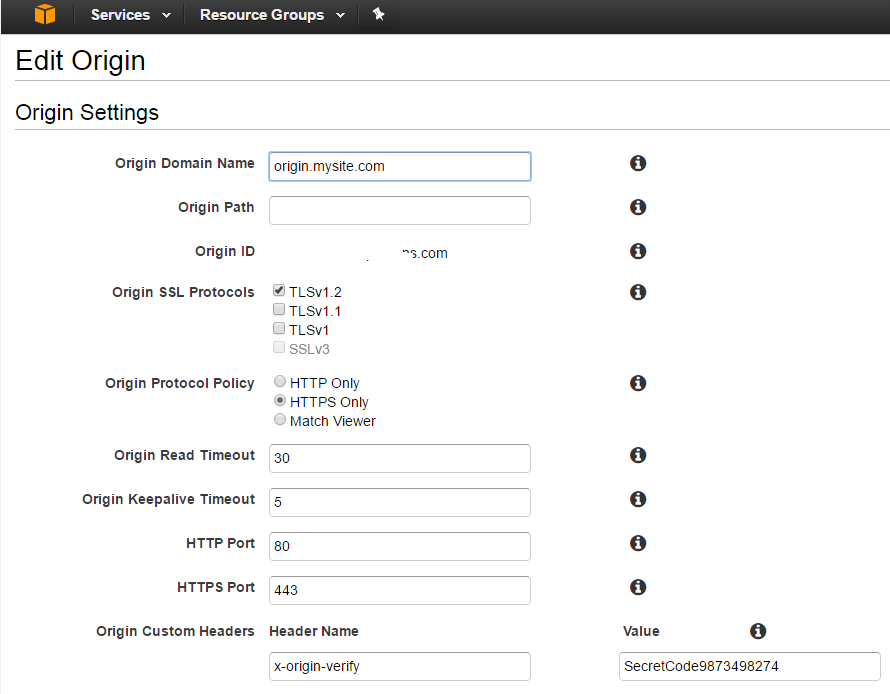
Protecting the Origin from public access using AWS WAF
In our scenario, we needed a way to make the origin server inaccessible to the general public, while allowing content editors direct access to it. A Web Application Firewall (AWS WAF) is attached to the ALB. The WAF is set up so that ONE OF THE FOLLOWING rules must be satisfied for entry. All other rules are denied:
- For editors: There is a rule to allow internal company ip’s. This can be modified as needed.
- For CloudFront: A verified-origin rule identifies these requests, based on a header which goes with all requests. Below is an example of using CURL to add the header to simulate a cloudfront request
- Any other special exceptions.
The second of these rules can be tested as follows (using an EXTERNAL) ip:
curl -sLIXGET -H 'x-origin-verify: SecretCode9873498274'
Here’s what it looks like from CloudFront:
Plugins
The following plugins are used to support various aspects of scalability.
- C3 Cloudfront Cache Controller – invalidates cloudfront as needed, when content is edited.
- ManageWP – this tool does a LOT, but is used in our case for convenience when copying the production database to dev to achieve consistency.
- WP Offload S3 Lite – WordPress media files (like images) are stored in S3, so they can be accessed from all instances.
- WP BASIC Auth – to protect the dev environment from general visibility.
AWS Credential Manager
In my work as a consultant, I’ve found the need to switch frequently between different sets of credentials. I’ve integrated some of the following methods into a .NET based credential management tool, located on github. This way I can switch my default credential in about 10 seconds, without looking anything up. Naturally all the source code is out there.
The README file pretty well documents the app. There are some improvements that could be made, but it’s my intention to keep this app pretty simple. I’ve posted more detail on credential management here.
The app also demonstrates how you can use credential management in your .NET app, if that’s your intention.
Let me know if you find it useful, or feel free to post questions.
Creating a Certificate Signing Request (CSR)
For a recent project we needed a signed certificate for an HTTPS server, and to import into the AWS Certificate Manager. This article is for you if you need to submit a CSR to an administrator or a signing authority (like DigiCert) who will sign your private key with their CA.
First you’ll need to create a private key, and then create your CSR from that, adding the necessary information.
As it turns out, there is a single OpenSSL command that will do all of that. The private key it creates is also suitable for import to the AWS Certificate Manager.
Start with the following information on hand:
- Country Code
- State/Province
- City
- Company Name (no abbreviations)
- Fully Qualified Domain Name (FQDN), e.g. intown.biz, or www.intown.biz. You can only use one FDQN, but you can use a wildcard, e.g. *.intown.biz.
- an administrator email address
Issue the following Command:
openssl req -new -nodes -out intown-biz.key.pem -keyout intown-biz.csr.pem
Sample results:
Generating a 2048 bit RSA private key
..............+++
...............+++
writing new private key to 'intown-biz.key.pem'
-----
You are about to be asked to enter information that will be incorporated
into your certificate request.
What you are about to enter is what is called a Distinguished Name or a DN.
There are quite a few fields but you can leave some blank
For some fields there will be a default value,
If you enter '.', the field will be left blank.
-----
Country Name (2 letter code) [AU]:US
State or Province Name (full name) [Some-State]:Maryland
Locality Name (eg, city) []:Bethesda
Organization Name (eg, company) [Internet Widgits Pty Ltd]:The In Town Company
Organizational Unit Name (eg, section) []:consulting
Common Name (e.g. server FQDN or YOUR name) []:intown.biz
Email Address []:administrator@intown.biz

Please enter the following 'extra' attributes
to be sent with your certificate request
A challenge password []:
An optional company name []:
Note that I skipped the optional parts, including the password.
This command is really doing three things:
- Creating a private key (and calling it intown-biz.key.pem)
- Prompting you for the information you need, for a signing certificate.
- Creating the signing certificate and calling it intown-biz.crt.pem)
Double check your work
Run this command to view the decoded value of your CSR.
openssl req -in intown-biz.crt.pem -noout -text
Submit the CSR
The CSR goes to your administrator, or a signing authority. The cool thing about the CSR is that once it is used to create your public key (or “certificate”), the key pair will be “signed” without having to hand over the actual private key to the signing authority.
Hold on to the private key! That’s the only copy you get. Make sure to follow your company’s policy for managing private keys.
When the signing request is processed, you should receive:
- The public certificate or “certificate body” which you can give out
- An intermediate CA or “Certificate Chain” which helps the server to locate the signing CA.
At this point you’re pretty much done with the CSR. With the pubic cert, private cert and intermediate ca in hand, you’re good to go!
If you’re using the AWS Certificate Manager, simply paste the text of these into the appropriate boxes.
Connect to an AWS CodeCommit git repository
Let’s review how to connect to an AWS CodeCommit git repository. As new git users quickly find out, each implementation of git (github, bitbucket, CodeCommit etc) has a slightly different way of authenticating the user. These steps only apply to the AWS implementation, and will apply to either Linux or Windows.
There are two ways developers can connect with git: ssh and https. With CodeCommit I have always used ssh, because it is simpler and works more easily.
There are AWS cli commands for high-level tasks (such as create repository, or list all repositories), but developers normally interact with CodeCommit through a standard git client.
Prerequisites
You’ll need:
- Your own AWS account. This is because AWS bills according to the number of users who access repositories. Currently the first 5 users are free, and after that the charge is $1/user/month (pricing).
- A git client. For Windows users, I recommend Git for Windows. This gives you a command line with everything that git offers, so there’s no additional layer to obscure its functionality. Best of all, you get a free Bash shell. So goodbye putty, hello ssh (for starters). If you are on Windows and do NOT use this client, sorry but these instructions probably do not apply to you.
Create SSH Key
The first step is to create an ssh key which will be used ONLY to authenticate us to CodeCommit. Open a bash shell and use the ssh-keygen command. Name the key as appropriate:
Michael@Mendelson MINGW64 /c/dev/aws/credential-manager (master)
$ ssh-keygen
Generating public/private rsa key pair.
Enter file in which to save the key (/c/Users/Michael/.ssh/id_rsa): codecommit
Enter passphrase (empty for no passphrase):
Enter same passphrase again:
Your identification has been saved in codecommit.
Your public key has been saved in codecommit.pub.
The key fingerprint is:
SHA256:OWyerhZPzJp5ozI/mF7PsHjU09Dq1hcYrBlcdgE+XEA Michael@Mendelson
The key's randomart image is:
+---[RSA 2048]----+
|         .Eoo.   |
|         oo..    |
|       . =+.     |
|       .+.+.     |
|       +SB o     |
|      ooXoo .    |
|     +oOoo   .   |
|    =oB** . .    |
|   .o*=*+. .     |
+----[SHA256]-----+
The command above creates two files: codecommit.pub (public key) and codecommit (private key). I recommend moving them both to your ~/.ssh/ directory.
Add Public Key to AWS
Log into AWS and go to the IAM (Identity & Access Management) service. Go to the list of users, and select your user. Find the Security Credentials tab. At the bottom you’ll see SSH keys for AWS CodeCommit. Click the upload button and paste in the SSH public key. When you click OK, take note of the SSH Key ID.
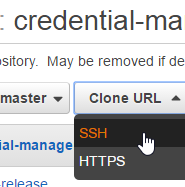
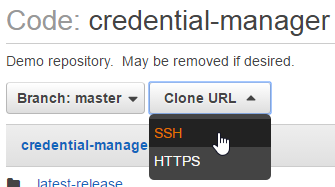
Get the Repository Url
While you’re in the AWS console, get your connection URL. In CodeDeploy, navigate to your repository and find it:
Set up Git
There are a couple of ways to make this work. I’ll star with the way I prefer.
SSH config file
Find your .ssh directory (linux: ~/.ssh, windows: C:\Users\Username\.ssh) and find a file called config. If it doesn’t exist, create it.
Add the following lines, substituting your SSH Key ID in the User field, and your private key file name in the IdentityFile field. Also note that the Host name specifies the AWS region where the repo was created:
Host git-codecommit.us-east-1.amazonaws.com
  User APKAJTDPQ6HZKPCBOCXQ
  IdentityFile ~/.ssh/codecommit
You should now be able to access your repository as follows (substitute your ssh string):
git clone ssh://git-codecommit.us-east-1.amazonaws.com/v1/repos/repo-name
Now let’s say you have repos in multiple AWS accounts. You can use the config file to set up an alias for each:
Host codecommit-myrepo
    Hostname git-codecommit.us-east-1.amazonaws.com
    User APKAJTDPQ6HZKPCBOCXQ
    IdentityFile ~/.ssh/codecommit
Host codecommit-client
    Hostname git-codecommit.us-east-1.amazonaws.com
    User APKAI4I45LFFKYK4T4A
    IdentityFile ~/.ssh/codecommit-client
Then access your repositories like this:
git clone ssh://codecommit-myrepo/v1/repos/repo-name
On the URL
With this method, you don’t need to bother with the config file – just add your SSH Key ID to the url string, and your key goes in your .ssh directory. It should be picked up automatically.
git clone ssh://APKAJTDPQ6HZKPCBOCXQ@git-codecommit.us-east-1.amazonaws.com/v1/repos/repo-name
Troubleshooting
Here’s a list of things to check, if you have everything set up, but you’re getting permission denied.
- Make sure your AWS account has the correct privileges to use CodeCommit. Here’s more information on that.
- Test your connection as follows:
Michael@Mendelson MINGW64 /c/dev/aws
$ ssh git-codecommit.us-east-1.amazonaws.com
You have successfully authenticated over SSH. You can use Git to interact with AWS CodeCommit. Interactive shells are not supported.Connection to git-codecommit.us-east-1.amazonaws.com closed by remote host.
Connection to git-codecommit.us-east-1.amazonaws.com closed.
If this test does not work, you can see ssh debugging information by modifying your config file to look like this:
Host git-codecommit.us-east-1.amazonaws.com
  User APKAJTDPQ6HZKPCBOCXQ
  IdentityFile ~/.ssh/codecommit
  LogLevel DEBUG3
This gives you a ridiculous amount of information. Use DEBUG2 or DEBUG1 if you prefer.
Managing AWS Credentials for .NET Developers
When developing .NET apps that use AWS, it’s helpful to know that there are a number of ways to store credentials. These can be used for AWS SDK for .NET calls in your app, or AWS CLI calls on the console. Of course these principles apply to other platforms as well. I’m going to assume that you have everything you need installed, including the AWS CLI.
An aside: In my work as a consultant, I’ve found the need to switch frequently between different sets of credentials. I’ve integrated some of the following methods into a .NET based credential management tool, located on github. This way I can switch my default credential quicky, determine which IAM account corresponds to a credential, and more. Naturally all the source code is out there. Let me know if you find it useful.
There are 4 distinct ways to do this. Some apply to your .NET code only (including Powershell scripts), and others apply only to the AWS CLI.
1. App.config file (see cautionary note)
Applies to: .NET code only
If you’re developing in .NET, you can simply add your Access Key and Secret Key in CLEAR TEXT to your program’s app.config file.
<add key="AWSAccessKey" value="EYNAEYNAEYNAEYNA"/>
<add key="AWSSecretKey" value="uAWguAWguAWguAWguAWguAWguAWg"/>
Cautionary note: There are circumstances where it’s appropriate to use this method, but be aware that you’re storing your credentials unencrypted. If you should accidentally check your config file into github, your account will be hacked in a matter of minutes. So please be careful.
2. System Properties
Applies to: .NET code and CLI
Another one-credential option is to store credentials in your user settings.
C:\Users\Michael> set AWS_ACCESS_KEY_ID=ABCDEABCDEABCDEABCDE
C:\Users\Michael> set AWS_SECRET_ACCESS_KEY=P08LdGmn9Q/8JT5A9wwCP08LdGmn9Q/8JT5A9wwC
C:\Users\Michael> set AWS_DEFAULT_REGION=us-east-1
IMO this is not preferable – I want to keep clear text credentials out of my settings.
3A. AWS Configure – One set of credentials
Applies to: .NET code and CLI
Use the aws configure command set or editing the credential file it uses to store information, you can manage and use multiple credential sets.
This works well if you have only one set of credentials to deal with, or just want to go with the simplest scenario.
C:\Users\Michael> aws configure
AWS Access Key ID [None]: ABCDEABCDEABCDEABCDE
AWS Secret Access Key [None]: P08LdGmn9Q/8JT5A9wwCP08LdGmn9Q/8JT5A9wwC
Default region name [None]: us-east-1
Default output format [None]: json
3B. AWS Configure – Multiple sets of credentials
Applies to: CLI only
Credentials stored using aws configure are stored a file in your user directory (%USERPROFILE%\.aws\credentials or ~/.aws/credentials). The credential file can store multiple sets, which appear in the file as “named” sections. To manage this, you can either use the aws configure –profile switch, or edit the file directly. Type aws configure help to see what else you can do with this. Note: default is set per the example above.
[default]
aws_access_key_id = ASDFASDFASDFASDFASDF
aws_secret_access_key = P08LdGmn9Q/8JT5A9wwCP08LdGmn9Q/8JT5A9wwC
[client-one]
aws_access_key_id = ABCDEABCDEABCDEABCDE
aws_secret_access_key = P08LdGmn9Q/8JT5A9wwCP08LdGmn9Q/8JT5A9wwC
[client-two]
aws_access_key_id = FGHIJFGHIJFGHIJFGHIJ
aws_secret_access_key = P08LdGmn9Q/8JT5A9wwCP08LdGmn9Q/8JT5A9wwC
NOTE: The best way to delete all of your credentials is to delete the file.
Using a stored profile
Applies to: CLI only
Now that you have aws configure profiles set up, you can tell AWS which one to use, while you’re logged in. Just the appropriate profile using the following command.
set AWS_DEFAULT_PROFILE=client-one
You can also specify the profile in the command. For example, to list all s3 buckets:
aws s3 ls --profile=client-one
4. API-Stored Credentials (for SDK use)
Applies to: .NET code only
The AWSSDK .NET has class Amazon.Util.ProfileManager which can store a named list of credentials. This gives programs like Cloudberry Explorer, and the AWS Visual Studio add-in a common place from which can save and retrieve credentials.
For an example of how to set these, use the c# code that I posted or look at the powershell script included with the AWS SDK for .NET.
These credentials are also stored in a file, which you’ll find at %LOCALAPPDATA%/AWSToolkit/RegisteredAccounts.json. This is similar to the way aws configure stores credentials, but this time they are encrypted!
Note: If one of your credential sets is called “default”, that will be used (and takes precedence over credentials set by AWS Configure).
Using a specific profile in your code
One handy feature is that if you have API stored credentials set, you can specify the default profile to use in the app.config or web.config file of your .NET application. The following configuration is an example:
<configuration>
  <appSettings>
    <add key="AWSProfileName" value="client-one"/>
  </appSettings>
</configuration>
References: